Recently I’ve found myself bouncing between various servers using SSH and FTP more often than one wishes. Obviously being the security conscious person I am, every password must be different and complex enough to defer even the most determined of intruders.
As you are probably all too well aware, this doesn’t half slow things down when travelling between servers; the remembering, the typing, the mis-remembering, the re-typing…
I was at the verge of despair when I decided to delve back into the Sys Admin module I took at University, and investigate using keys as an alternative authentication system.
My first goal was to streamline the connection between my Windows laptop and my Linux NAS, using my tool of choice, PuTTY.
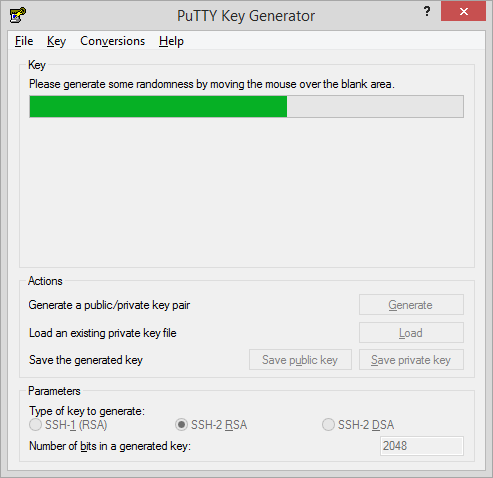
- We need to create a Public/Private key combination. For this we’ll fire up PuTTYgen, which is installed automatically with PuTTY.
- Hit the Generate button, and squiggle your mouse around until the bar fills up!
- I like to add a bit more of a description to the comment here, usually username@servername of what I’m connecting to.
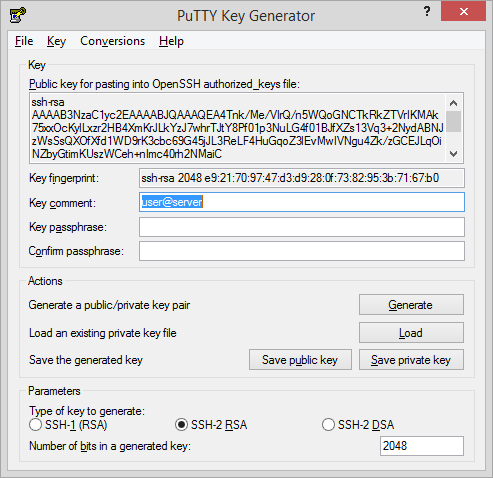
- Next we need to Save private key, now it doesn’t really matter where you save it to, my preference at the moment is username@servername.ppk in a Keys folder under my user profile e.g. C:\Users\Username\Keys.
- Now for what should be the last time, we need to login to our server using our username and password, and navigate to the .ssh folder e.g. cd ~/.ssh
- Then we either need to create or edit a file called authorized_keys, note that the file doesn’t have an extension. Welcome to the crazy world of Linux! Anyway we can do this by calling any editor we like, personally I use vim so execute vim authorized_keys
- Then we need to copy and paste (right click to paste into a PuTTY session) the content from PuTTYgen box Public key for pasting into Open SSH authorized_keys file into our editor.
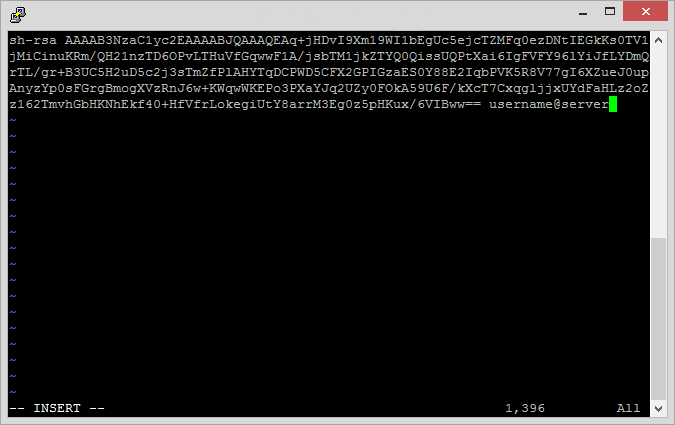
- If you’re still using vim, press Esc followed by :wq to save and exit.
That should be everything needed to get the SSH set up. Close your PuTTY session and try connecting to your server in a new session.
Still here? Yup, we’re not quite done yet. Windows and PuTTY don’t know how to use our private key at the moment, so we are still prompted for our password. Luckily PuTTY comes with a nifty little utility called Pageant (not sure what it stands for but I always forget the second ‘a’).
Double clicking on the private key we saved earlier should open up Pageant and add our key to the store. Then next time we create a new session with the server we should be logged in automatically.
This is all well and good, however if we were to restart our PC and try to connect to our server we would once again be prompted for our username and password. This is because Pageant does not persist our keys, or even automatically startup. Adding this functionality is pretty easy to achieve following these steps.
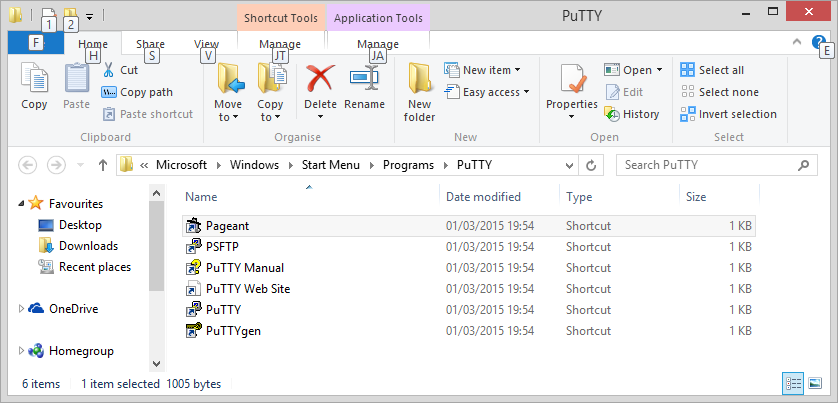
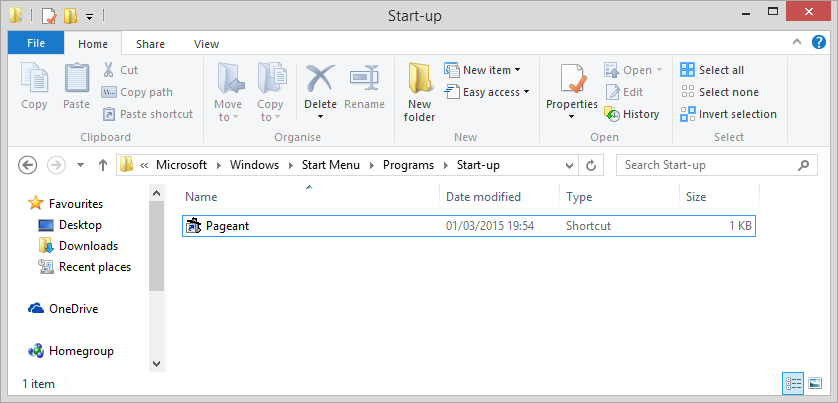
- Locate the Pageant shortcut on the Start Menu, on Windows 8 it’s as simple as pressing the Windows key, typing pageant, right clicking on the search result and selecting Open file location.
- It should take you to somewhere like C:\ProgramData\Microsoft\Windows\Start Menu\Programs\PuTTY
- Now we need to copy the shortcut for Pageant and paste it in our Startup folder. This can be located by navigating to %APPDATA%\Microsoft\Windows\Start Menu\Programs\Startup
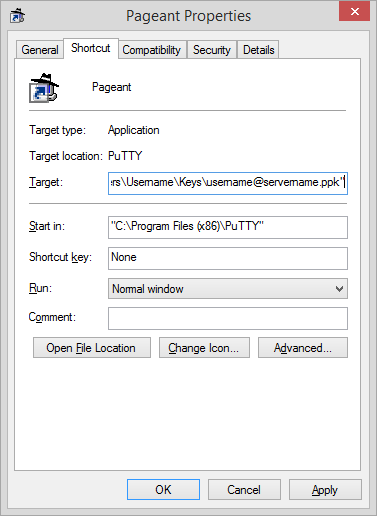
- Next we need to tell Pageant what keys to load when it starts up. Right click on the newly pasted shortcut, and select Properties
- In the target field we need to append the path to each of our keys e.g. a complete target field could look like “C:\Program Files (x86)\PuTTY\pageant.exe” “C:\Users\Username\Keys\username@servername.ppk”
That’s it. All done. Fire it up and give it a go. I use Windows 8.1 with the latest installed version of PuTTY and the server has Ubuntu 14 on it, so depending on your setup some paths could be different. Good luck.